
Spring hinges are an invaluable addition to doors that require the convenience of self-closure. Whether for a busy commercial setting or your home’s entryways, these hinges enhance security and efficiency. In this comprehensive guide, we will walk you through the step-by-step installation process for various types of spring hinges, ensuring a smooth and successful setup.
Before You Begin
Gather Tools: Before diving in, ensure you have all the necessary tools at hand. A screwdriver, drill, measuring tape, and pencil are essential for a seamless installation.
Safety First: Prioritize your safety. If the door you’re working with is heavy, it’s advisable to enlist the assistance of a second person to prevent accidents.
Single Action Spring Hinges

Single action hinges close the door in one direction. Let’s delve into the installation process in detail:
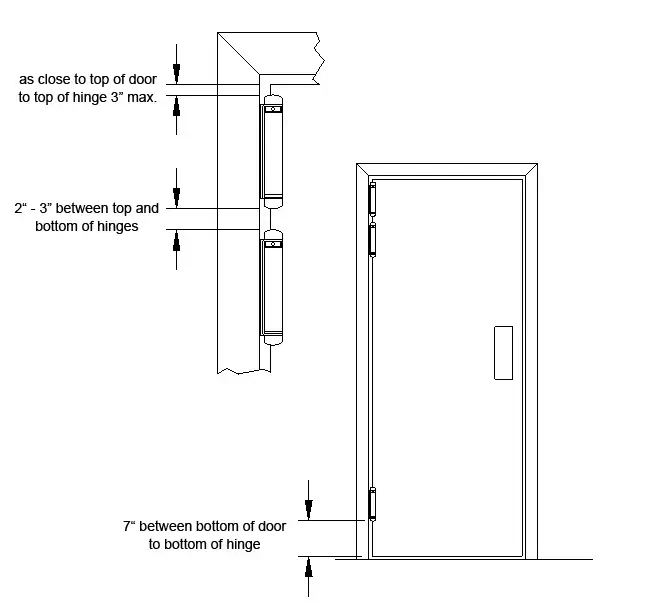
Step 1: Mark the Position
Open the door fully and secure it in place.
Place the hinge against the door jamb where you intend to install it.
Using a pencil, mark the precise spots where the hinge’s screws will go.
Step 2: Pre-drill Holes
Opt for a drill bit that’s slightly smaller in diameter than the screws you’ll be using.
Create pilot holes in the marked spots. These will make screwing the hinge easier and prevent splitting.
Step 3: Attach Hinge to Door Jamb
Hold the hinge against the door jamb, ensuring the holes align with the pilot holes.
Gently insert the screws into the pilot holes and gradually tighten them, ensuring a secure fit but avoiding overtightening that might damage the wood.
Step 4: Attach Hinge to Door
Close the door and hold the hinge against its edge, aligning it with the corresponding holes.
Gradually insert and tighten the screws.
Double Action Spring Hinges
Double action hinges facilitate door closure in both directions. The installation process shares similarities with single action hinges:
Step 1: Mark the Position
Open the door and stabilize it.
Position the hinge on the door jamb at the desired location and mark the spots for the screws.
Step 2: Pre-drill Holes
Use your drill to create pilot holes in the marked spots.
Step 3: Attach Hinge to Door Jamb
Align the holes in the hinge with the pilot holes.
Secure the hinge by gently inserting and tightening the screws.
Step 4: Attach Hinge to Door
Close the door and position the hinge holes to match those on the door.
Gradually insert and tighten the screws.
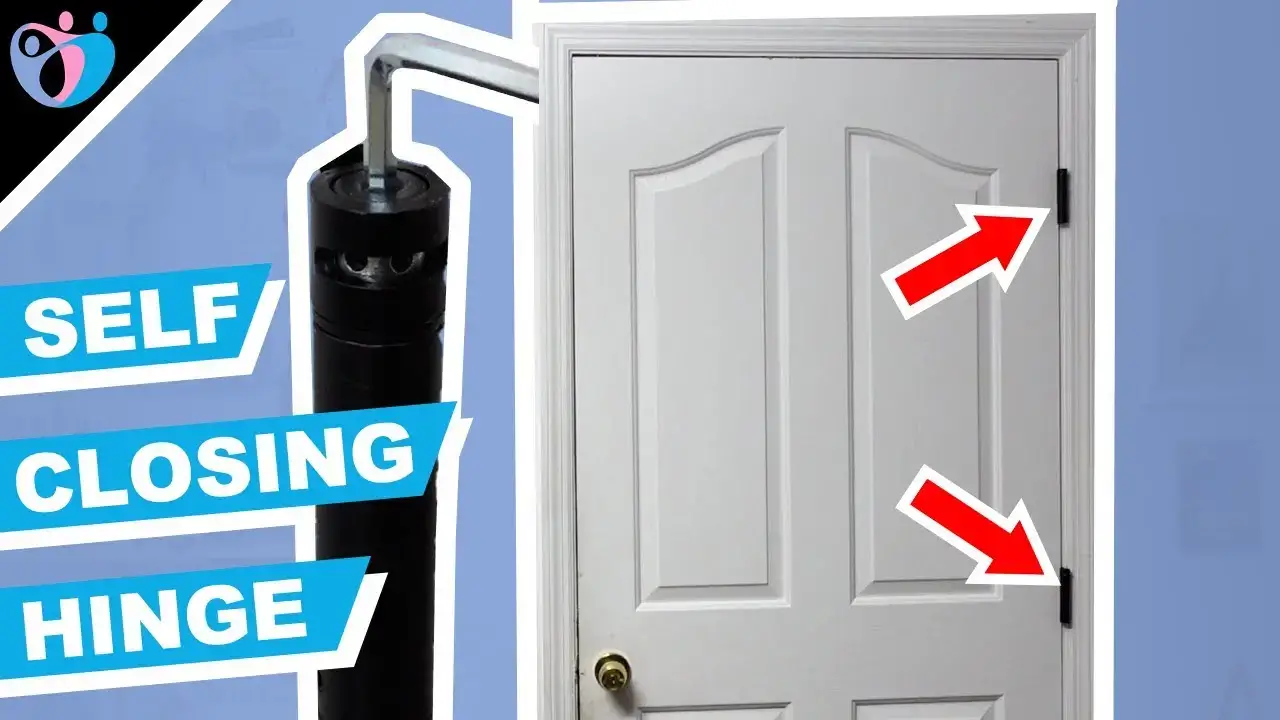
Self-Closing Spring Hinges
Self-closing hinges offer the convenience of automatic door closure. Here’s how to expertly install them:
Step 1: Mark the Position
Open the door and ensure it remains steady.
Place the hinge against the door frame at the chosen position and mark the locations for the screws.
Step 2: Pre-drill Holes
Use your drill to create holes that match the size of the screws.
Step 3: Attach Hinge to Door Frame
Hold the hinge against the marked spots, ensuring alignment with the pilot holes.
Gently insert and secure the screws.
Step 4: Attach Hinge to Door
Close the door and ensure the hinge holes line up with the door’s holes.
Gradually insert and tighten the screws.
Adjustable Spring Hinges
Adjustable hinges allow you to control the closing force. Here’s how to install them:
Step 1: Mark the Position
Open the door and stabilize it.
Position the hinge on the door frame where you plan to install it. Mark the screw spots.
Step 2: Pre-drill Holes
Use a drill to create pilot holes for the screws.
Step 3: Attach Hinge to Door Frame
Align the hinge holes with the pilot holes.
Gently insert the screws, securing the hinge in place.
Step 4: Attach Hinge to Door
Close the door and position the hinge holes.
Gradually insert and tighten the screws.
Floor Spring Hinges
Floor spring hinges, also known as floor-mounted door closers, are commonly used for heavy doors or doors that need to swing in both directions. These hinges are installed into the floor and offer controlled door closing. Here’s a detailed installation guide for floor spring hinges:
Step 1: Choose the Right Location
Decide where you want to install the floor spring hinge. It’s crucial to choose a location that allows the door to swing freely without any obstructions.
Step 2: Mark the Positions
With the door in the closed position, place the floor spring hinge on the floor where you want to install it.
Mark the spots for drilling the holes using a pencil.
Step 3: Pre-drill Holes
Use the appropriate drill bit to create holes at the marked spots. Make sure the holes are deep enough to accommodate the screws.
Step 4: Install the Hinge Case
Insert the floor spring hinge into the pre-drilled holes in the floor.
Secure the hinge case in place by inserting screws into the holes and tightening them.
Step 5: Install the Pivot Arm
Attach the pivot arm to the top of the door, aligning it with the hinge case on the floor.
Insert the pivot arm into the hinge case.
Step 6: Adjust the Closing Force
Many floor spring hinges come with adjustable settings for closing force. Consult the manufacturer’s instructions to set the closing force according to your preference.
Step 7: Test the Door
Open and close the door several times to ensure that the floor spring hinge is working properly.
Make any necessary adjustments to the closing force or alignment if needed.
Concealed Spring Hinges
Concealed spring hinges, also known as invisible hinges or European hinges, are designed to be hidden from view when the door is closed. They provide a clean and streamlined appearance to doors. Installing concealed spring hinges can be a bit more intricate, but let’s break down the process step by step:
Step 1: Mark the Hinge Locations
Open the door to a 90-degree angle and place the hinge on the door frame.
Use a pencil to mark the locations for the hinge cup holes and the screw holes on the door frame.
Step 2: Drill the Hinge Cup Holes
Use a drill bit specifically designed for hinge cups and drill the holes at the marked locations on the door frame.
Make sure the depth of the holes matches the depth of the hinge cups.
Step 3: Install the Hinge Cups
Insert the hinge cups into the holes on the door frame.
Secure them in place using screws provided with the hinge.
Step 4: Mark the Hinge Arm Location
Close the door and mark the location on the edge of the door where the hinge arm will be attached.
Step 5: Drill the Hinge Arm Hole
Use a drill bit to create a hole at the marked location on the edge of the door. This hole will accommodate the hinge arm.
Step 6: Install the Hinge Arm
Insert the hinge arm into the hole on the door and secure it with screws.
Step 7: Adjust the Hinge
Concealed spring hinges often come with adjustable features. Consult the manufacturer’s instructions to adjust the hinge tension and alignment as needed.
Step 8: Test the Door
Open and close the door several times to ensure that the concealed spring hinge is functioning smoothly.
Make any necessary adjustments to the tension or alignment for optimal performance.
Conclusion
This guide takes the complexity out of installing spring hinges. Following each step meticulously, using the correct tools, and keeping safety at the forefront will ensure a successful installation. Regardless of the hinge type – whether it’s single action, double action, self-closing, or adjustable – mastering the installation process leads to doors that close smoothly, offering both convenience and enhanced security.