(Notes: Continue to post from the Installation Steps for Swing Door Hinges: Part 1)
6. Installing Concealed Hinges: Keeping It Sleek and Hidden
Concealed hinges, also known as European hinges, offer a clean and sleek look by being hidden inside the cabinet door. Here’s how to install them:
Materials You’ll Need:
Concealed hinges
Mounting plates
Screws
Screwdriver or drill
Measuring tape
Installation Steps:
Step 1: Door Preparation
Attach the mounting plates to the door as per the manufacturer’s instructions.
Step 2: Frame Preparation
Open the door to a 90-degree angle and place it in the desired closed position.
Attach the other part of the mounting plate to the cabinet frame.
Step 3: Attaching the Hinge Cups
Slide the hinge cups into the mounting plates on the door.
Secure them with screws.
Step 4: Testing the Door
Open and close the door to ensure it operates smoothly and aligns properly.
Pro Tips:
Check the overlay (how much the door covers the cabinet frame) to ensure proper alignment.
Concealed hinges often come with adjustment features for aligning doors perfectly.
7. Installing Bi-Fold Hinges: Folding Doors with Finesse
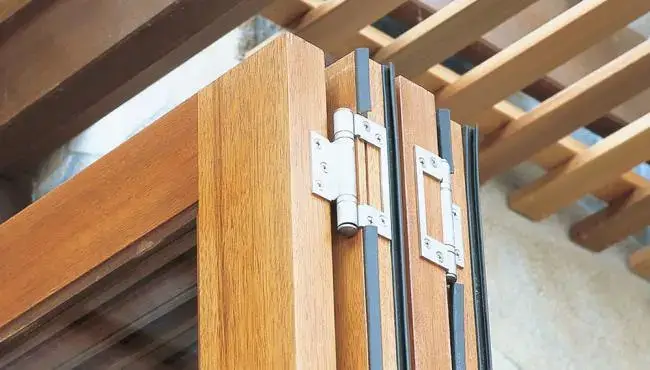
Bi-fold hinges are the go-to solution for folding doors, such as closet doors. Here’s how to install them:
Materials You’ll Need:
Bi-fold hinges
Screws
Screwdriver or drill
Pencil or marker
Installation Steps:
Step 1: Door and Frame Preparation
Open the door panels and lay them flat.
Position the bi-fold hinges on the top and bottom edges of the panels, ensuring they align.
Step 2: Marking the Hinge Position
Use a pencil or marker to mark the screw holes on both the door panels.
Step 3: Pre-Drill Holes
Choose a drill bit slightly smaller than the screws’ diameter.
Pre-drill holes at the marked locations on the door panels.
Step 4: Attaching the Hinges
Align the holes on the hinges with the pre-drilled holes.
Insert the screws and tighten them securely.
Step 5: Testing the Fold
Gently fold and unfold the door panels to ensure they move smoothly on the bi-fold hinges.
Pro Tips:
Check the manufacturer’s guidelines for weight limits and spacing requirements for bi-fold doors.
Bi-fold hinges often come with adjustment features for aligning and fine-tuning the folding action.
8. Installing Double Action Hinges: For Swinging Both Ways
Double action hinges, also known as saloon door hinges, are perfect for doors that need to swing in both directions. Here’s how to install them:
Materials You’ll Need:
Double action hinges
Screws
Screwdriver or drill
Pencil or marker
Installation Steps:
Step 1: Door Preparation
Open the door to a 90-degree angle.
Position one part of the double action hinge on the door.
Step 2: Frame Preparation
Open the other side of the door and position the other part of the hinge on the frame.
Step 3: Marking the Hinge Position
Use a pencil or marker to mark the screw holes on both the door and the frame.
Step 4: Pre-Drill Holes
Choose a drill bit slightly smaller than the screws’ diameter.
Pre-drill holes at the marked locations on the door and frame.
Step 5: Attaching the Hinges
Align the holes on the hinges with the pre-drilled holes.
Insert the screws and tighten them securely.
Step 6: Testing the Swing
Gently swing the door in both directions to ensure the double action hinge works smoothly.
Pro Tips:
Check the weight capacity of the double action hinges to ensure they can handle your door’s weight.
Maintain proper clearance between the door and frame to avoid any friction.
9. Installing T-Hinges: Traditional and Sturdy

T-hinges are classic hinges that add a touch of tradition to your doors. Here’s how to install them:
Materials You’ll Need:
T-hinges
Screws
Screwdriver or drill
Pencil or marker
Installation Steps:
Step 1: Door and Frame Preparation
Position one hinge leaf on the door’s edge and the other on the door frame’s edge.
Step 2: Marking the Hinge Position
Use a pencil or marker to mark the screw holes on both the door and the frame.
Step 3: Pre-Drill Holes
Choose a drill bit slightly smaller than the screws’ diameter.
Pre-drill holes at the marked locations on the door and frame.
Step 4: Attaching the Hinges
Align the holes on the hinge leaves with the pre-drilled holes.
Insert the screws and tighten them securely.
Step 5: Testing the Swing
Gently swing the door to ensure it opens and closes smoothly on the T-hinges.
Pro Tips:
T-hinges are often used for decorative purposes as well, so choose a style that matches your door and aesthetics.
Ensure the hinge placement provides enough clearance between the door and frame for smooth movement.
10. Installing Strap Hinges: For a Rustic Appeal
Strap hinges are a great choice for doors that need a touch of rustic charm. Here’s how to install them:
Materials You’ll Need:
Strap hinges
Screws
Screwdriver or drill
Pencil or marker
Installation Steps:
Step 1: Door and Frame Preparation
Position one part of the strap hinge on the door’s edge and the other on the door frame’s edge.
Step 2: Marking the Hinge Position
Use a pencil or marker to mark the screw holes on both the door and the frame.
Step 3: Pre-Drill Holes
Choose a drill bit slightly smaller than the screws’ diameter.
Pre-drill holes at the marked locations on the door and frame.
Step 4: Attaching the Hinges
Align the holes on the hinge leaves with the pre-drilled holes.
Insert the screws and tighten them securely.
Step 5: Testing the Swing
Gently swing the door to ensure it opens and closes smoothly on the strap hinges.
Pro Tips:
Strap hinges are often used for gates and larger doors. Consider the weight and size of your door when choosing strap hinges.
Their decorative appeal can enhance both the door’s functionality and its visual impact.
Conclusion: Expertise in Every Swing
From spring hinges that add convenience to concealed hinges that keep things sleek, each type of hinge brings its unique functionality and charm. Armed with this installation guide, you have the knowledge to tackle various hinge types with confidence. Remember, precise alignment and secure attachment are the keys to ensuring your doors swing seamlessly, whether they’re cabinet doors, entrance doors, or gates. Happy swinging!
(Notes: The first part is Installation Steps for Swing Door Hinges: Part 1)