
Swing door hinges are the quiet performers in the world of doors, ensuring that your entryways glide open and shut with grace. Whether you’re faced with the sturdy butt hinges, the versatile pivot hinges, or the seamless continuous hinges, getting the installation right is essential for a smoothly swinging door. In this comprehensive guide, we’ll take you through the nitty-gritty of installing various types of swing door hinges, making your DIY door project a breeze.
Why Hinge Installation Matters
Picture this: a beautifully crafted door that sticks or sags when opened. The culprit? Poor hinge installation. Getting your hinges right is not just about aesthetics; it’s the foundation for a functional and visually appealing door. Properly installed hinges ensure that your door operates seamlessly, enhancing both convenience and visual appeal.
(Notes: The below part of the blog: Installation Steps for Swing Door Hinges is divided into two parts. The second part title is Installation Steps for Swing Door Hinges: Part 2)
1. Installing Butt Hinges: Your Door’s Silent Stars
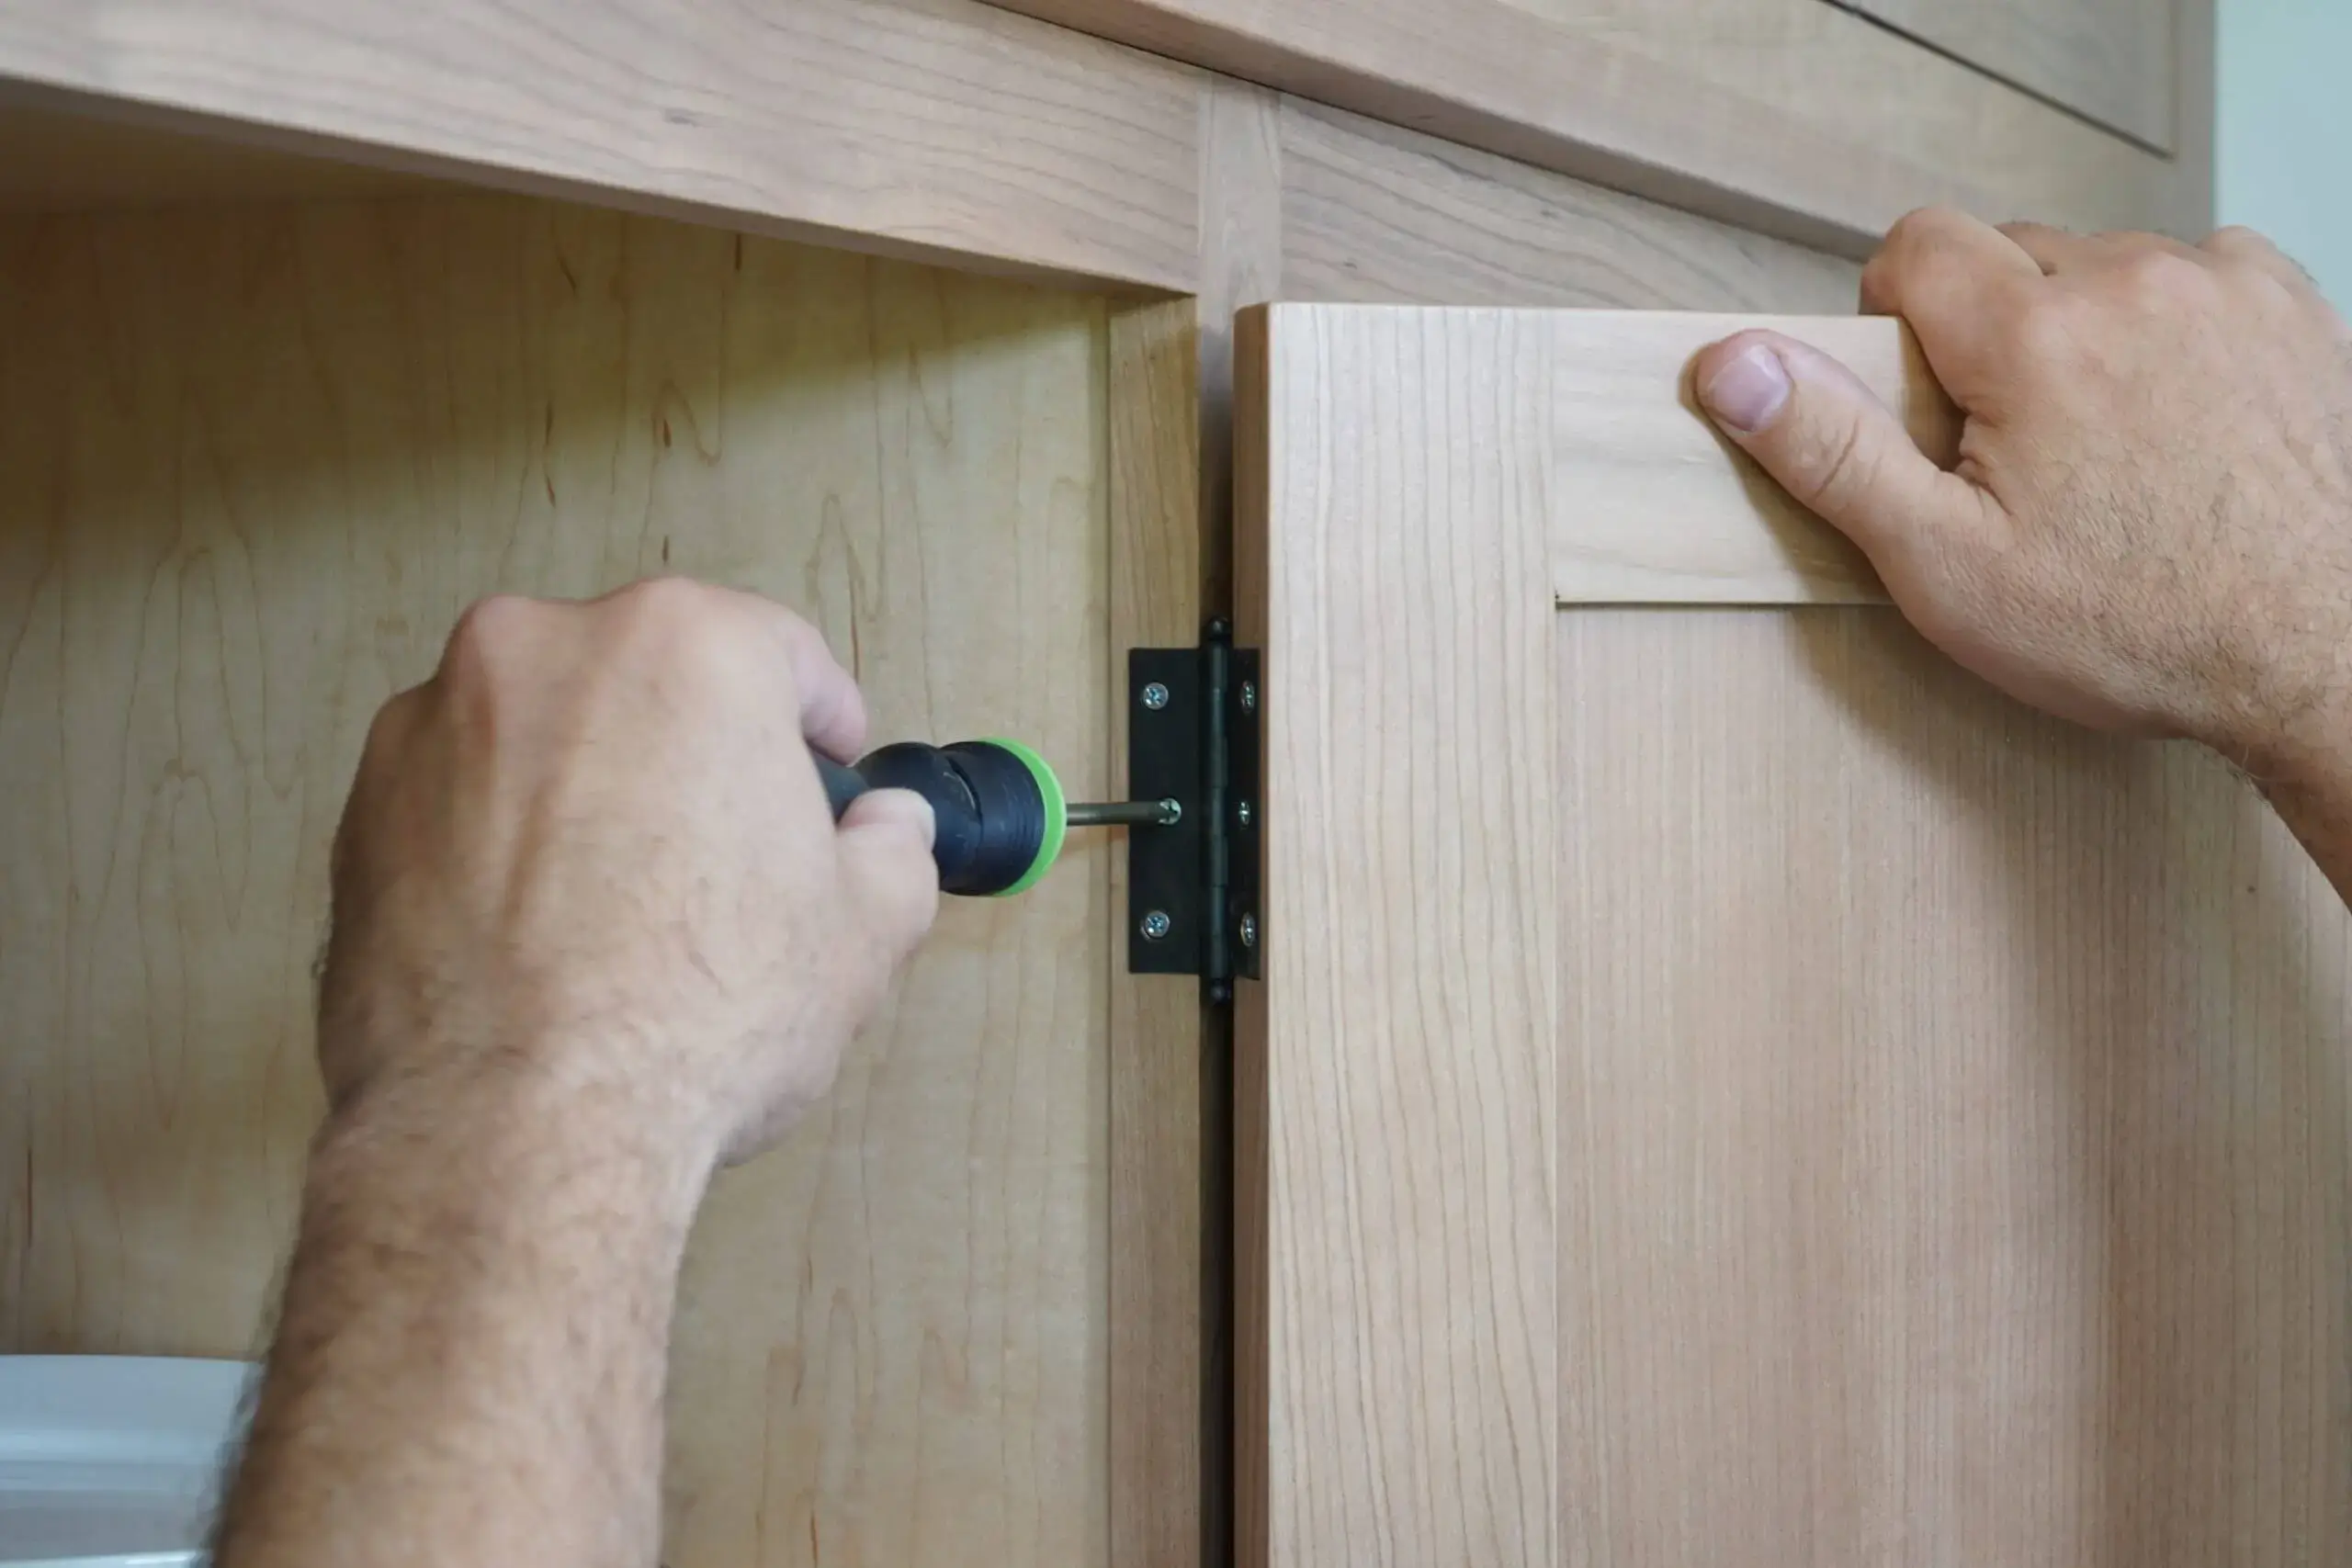
Butt hinges, the quiet champions of door movement, are found in countless homes, ensuring doors open and close with ease. They may seem straightforward, but their proper installation is essential for smooth door operation. Let’s walk through the steps of installing butt hinges, ensuring your doors swing seamlessly.
Materials You’ll Need:
Butt hinges
Screws
Screwdriver or drill
Pencil or marker
Measuring tape
Step-by-Step Guide:
Step 1: Prepare the Door and Frame
Open the door to a 90-degree angle.
Place one hinge leaf on the door’s edge and the other on the door frame’s edge. Ensure they align.
Step 2: Mark the Hinge Position
With hinges in position, mark the screw holes on both the door and frame using a pencil or marker. These marks guide your drilling.
Step 3: Pre-Drill Holes
Choose a drill bit slightly smaller than your screws.
Carefully pre-drill holes at your marked spots on the door and frame to prevent wood from splitting.
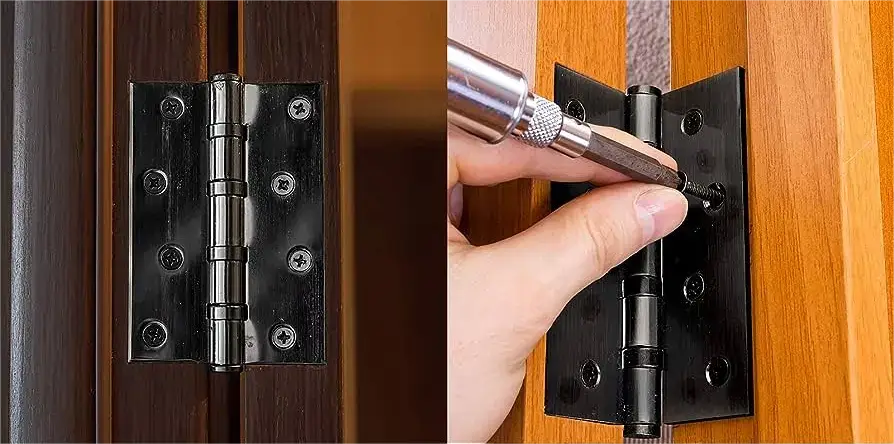
Step 4: Attach the Hinges
Align hinge holes with pre-drilled holes on the door and frame.
Insert screws and tighten firmly, but avoid over-tightening to maintain smooth hinge movement.
Step 5: Check and Test
With hinges securely attached, gently open and close the door to ensure smooth movement without friction.
Pro Tips:
When installing multiple hinges, start with the top hinge for proper alignment.
Enlist a helper to steady the door during installation for accurate hinge placement.
Use longer screws for the hinge leaf on the door frame to enhance stability.
2. Installing Pivot Hinges: Opening Doors to Smooth Swings
Pivot hinges are the masters of versatility, allowing doors to swing in both directions. Their proper installation ensures doors move effortlessly and reliably. Let’s walk through the steps of installing pivot hinges, enabling your doors to pivot gracefully.
Materials You’ll Need:
Pivot hinges
Screws
Screwdriver or drill
Pencil or marker
Measuring tape
Step-by-Step Guide:
Step 1: Prepare the Door and Frame
Open the door to a 90-degree angle.
Place the pivot hinge on the top and bottom of the door and frame.
Step 2: Mark the Pivot Point
On both the door’s top and frame, mark the point where the pivot will be positioned.
Step 3: Pre-Drill Holes
Using a drill bit, pre-drill holes at the marked pivot points.
Step 4: Attach the Pivot Hinges:
Align the pivot hinges with the pre-drilled holes.
Insert screws and tighten them securely.
Step 5: Test the Pivot
Gently pivot the door to ensure smooth movement on the hinges.
Pro Tips
Enlist a helper when attaching the top pivot hinge to keep the door steady.
If the door doesn’t pivot smoothly, adjust the screws slightly until you achieve smooth movement.
Lubricate pivot hinges occasionally for optimal performance.
3. Installing Continuous Hinges: A Seamlessly Supported Door
Continuous hinges, also known as piano hinges, provide a streamlined solution for doors that require consistent support along their entire length. From wardrobe doors to folding partitions, continuous hinges ensure smooth and reliable operation. Let’s dive into the step-by-step process of installing these versatile hinges.
Materials You’ll Need:
Continuous hinge
Screws
Screwdriver or drill
Pencil or marker
Measuring tape
Installation Steps:
Step 1: Door Preparation
Lay the door flat on a stable surface, such as a workbench or sawhorses.
Position the continuous hinge along the edge of the door where you want it to be installed.
Step 2: Marking the Hinge Position
Use a pencil or marker to mark the locations of the hinge holes along the entire length of the door.
Ensure that the hinge is aligned evenly with the edge of the door.
Step 3: Pre-Drill Holes
Choose a drill bit that’s slightly smaller than the screws you’ll be using.
Carefully pre-drill holes at the marked locations on the door. This prevents wood splitting when inserting the screws.
Step 4: Attaching the Hinge
Place the continuous hinge back on the door, aligning the holes on the hinge with the pre-drilled holes on the door.
Insert the screws and tighten them snugly. As with all hinge installations, avoid overtightening.
Step 5: Testing the Swing
Gently open and close the door to ensure it moves smoothly along the continuous hinge.
Pro Tips:
Use a helper to hold the door steady during installation, especially if the door is large or heavy.
For heavier doors, consider using longer screws for added stability.
Ensure the hinge is aligned perfectly along the edge of the door to avoid any misalignment issues.
4. Installing Ball Bearing Hinges: The Smooth Operators for Your Doors
Ball bearing hinges are the champions of smooth door movement. These specialized hinges use ball bearings to reduce friction, making your door open and close effortlessly. Whether for heavy doors or those that require frequent use, ball bearing hinges are a popular choice. Let’s dive into the installation process of these door movement maestros.
Materials You’ll Need:
Ball bearing hinges
Screws
Screwdriver or drill
Pencil or marker
Measuring tape
Installation Steps:
Step 1: Door and Frame Preparation
Open the door to a 90-degree angle.
Place one hinge leaf on the door edge and the other on the door frame edge, ensuring they align perfectly.
Step 2: Marking the Hinge Position
Once the hinges are positioned, use a pencil or marker to mark the screw holes on both the door and the frame. This will serve as a guide for drilling.
Step 3: Pre-Drill Holes
Choose a drill bit that’s slightly smaller than the screws you’ll be using.
Gently pre-drill holes at the marked locations on the door and frame. This helps prevent any wood splitting when you insert the screws.
Step 4: Attaching the Hinges
Line up the holes on the hinge leaves with the pre-drilled holes on the door and frame.
Carefully insert the screws and tighten them snugly, making sure not to overtighten.
Step 5: Testing and Final Check
With the hinges securely attached, gently open and close the door. You’ll notice the smooth, effortless movement that ball bearing hinges provide.
Pro Tips:
If you’re installing multiple ball bearing hinges, start with the top hinge and work your way down. This helps maintain proper alignment.
Use longer screws for the hinge leaf that attaches to the door frame for added stability.
Ball bearing hinges are often used for heavy doors, so ensure the screws are securely fastened to handle the weight.
5. Installing Spring Hinges: Bringing Automatic Door Control
Spring hinges are the magic touch for doors that need to close automatically. These hinges come in handy for ensuring doors don’t accidentally stay open, especially in busy areas. Let’s walk through the installation steps:
Materials You’ll Need:
Spring hinges
Screws
Screwdriver or drill
Pencil or marker
Measuring tape
Installation Steps:
Step 1: Door and Frame Preparation
Open the door to a 90-degree angle.
Position one spring hinge on the door’s top and the other on the door frame. Ensure they align.
Step 2: Marking the Hinge Position
Use a pencil or marker to mark the screw holes on both the door and the frame, based on the hinge’s placement.
Step 3: Pre-Drill Holes
Choose a drill bit slightly smaller than the screws’ diameter.
Pre-drill holes at the marked locations on the door and frame.
Step 4: Attaching the Hinges
Align the holes on the hinge leaves with the pre-drilled holes.
Insert the screws and tighten them securely.
Step 5: Testing the Spring Action
Gently open the door to an angle less than 90 degrees and release it. The spring action should gently close the door. Adjust the tension if needed.
Pro Tips:
Follow the manufacturer’s guidelines for adjusting the spring tension.
Double-check the direction of the hinges – they should be installed correctly for the spring action to work.
(Notes: The second part is Installation Steps for Swing Door Hinges: Part 2)