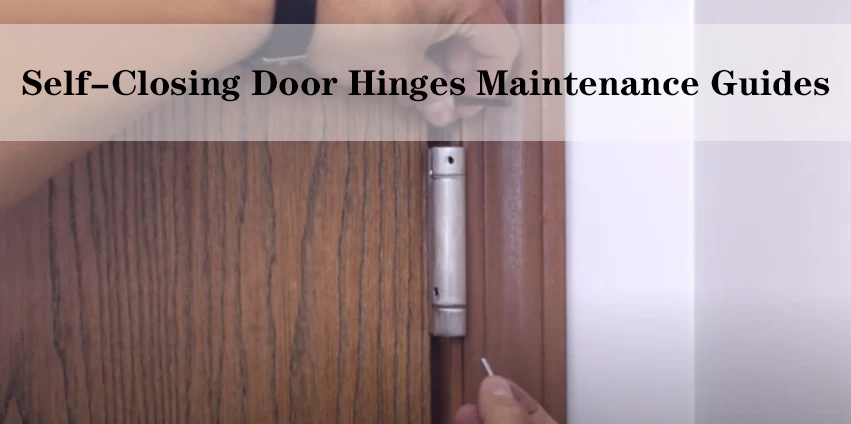
Hidden door hinges, also known as concealed hinges, offer a sleek and modern solution for doors, cabinets, and furniture. They are not only functional but also add an element of elegance to your living spaces. However, like any other hardware, hidden door hinges require regular maintenance to ensure they continue to function smoothly and have a long lifespan. In this comprehensive guide, we’ll explore the steps you can take to maintain your hidden door hinges, extend their longevity, and keep your doors looking and working their best.
Chapter 1: Understanding Hidden Door Hinges
Before we delve into maintenance, it’s important to have a basic understanding of hidden door hinges:
1.1. Types of Hidden Door Hinges
Hidden door hinges come in various types, including pivot hinges, European-style hinges, and Soss hinges. Understanding the specific type you have will help you maintain them effectively.
1.2. Benefits of Hidden Door Hinges
Hidden door hinges offer advantages like a clean, uncluttered look, smooth operation, and enhanced security. Knowing their benefits will motivate you to keep them in excellent condition.
Chapter 2: Regular Cleaning
2.1. Cleaning Supplies
Maintaining your hidden door hinges begins with assembling the right cleaning supplies. To ensure that your hinges remain in top condition, you’ll need the following:
A soft, lint-free cloth: This will be your primary tool for wiping down and polishing the hinge.
Mild detergent: Opt for a gentle, non-abrasive detergent that won’t harm the hinge’s finish.
A toothbrush or cotton swabs: These are essential for detailed cleaning, especially in those hard-to-reach nooks and crannies.
Warm water: Use it in conjunction with the mild detergent for effective cleaning.
It’s vital to steer clear of abrasive cleaners or harsh chemicals as they can potentially damage the hinge’s finish and compromise its longevity.
2.2. Cleaning Process
Properly cleaning your hidden door hinges involves a systematic approach:

Start by removing the door if it’s feasible. This step makes the cleaning process significantly more accessible, allowing you better access to the hinge.
Take a soft cloth and dampen it with the mild detergent solution. Ensure it’s not overly wet; a slightly damp cloth is sufficient.
Gently wipe down the hinge surfaces, paying particular attention to any areas with visible dirt or grime buildup. Use a light touch to avoid any potential damage to the hinge’s finish.
For those tight spots and crevices that can’t be reached with the cloth, employ a toothbrush or cotton swab. These tools are excellent for removing dirt and grime from corners and hidden areas.
Once the cleaning process is complete, it’s crucial to allow the hinge to air dry naturally. Ensure that no moisture remains on the hinge’s surfaces.
2.3. Frequency of Cleaning
To maintain the pristine condition of your hidden door hinges, a regular cleaning schedule is essential. Aim to clean your hinges at least once every three to six months. However, if your doors are exposed to high traffic, dusty environments, or excess moisture, consider increasing the frequency of cleaning to ensure optimal performance and appearance.
Chapter 3: Lubrication
3.1. Lubricants
Selecting the right lubricant for your hidden door hinges is crucial. The lubricant should provide long-lasting, smooth operation without attracting dust or debris. Two excellent choices are silicone-based or Teflon-based lubricants. These lubricants offer durability and effectiveness while minimizing maintenance requirements.
3.2. Lubrication Process
Proper lubrication ensures that your hinges continue to function seamlessly. Here’s how to go about it:
Apply a small amount of your chosen lubricant to the hinge’s pivot points. These are the areas where friction occurs during door movement.

To evenly distribute the lubricant, work the hinge by opening and closing the door several times. This action allows the lubricant to penetrate and coat the moving parts, promoting smooth operation.
After lubricating the hinge, take a clean cloth and wipe away any excess lubricant. This step prevents the accumulation of dust and grime on the hinge surfaces.
3.3. Frequency of Lubrication
Lubrication is a maintenance task that should be performed regularly to ensure the longevity of your hidden door hinges. A general guideline is to lubricate your hinges every six to twelve months. However, be attentive to any signs of stiffness, squeaking, or diminished performance. If you notice these issues, lubricate your hinges promptly.
Chapter 4: Tightening Loose Screws
4.1. Inspect for Loose Screws
To maintain the structural integrity and alignment of your hidden door hinges, it’s essential to routinely check for loose screws. Loose screws can adversely affect the door’s alignment and overall functionality.
4.2. Tightening Screws

When you identify loose screws, follow these steps:
Use a screwdriver that matches the type of screws used in your hinges. This ensures a secure and proper fit.
Carefully and gently tighten any loose screws. It’s crucial to exert just enough force to secure them without over-tightening, which could strip the screw holes.
4.3. Frequency of Screw Checks
Regular inspections of the screws on your hidden door hinges are advisable every three to six months. By promptly addressing loose screws, you prevent potential alignment issues and ensure the continued reliability of your hinges.
Chapter 5: Checking for Alignment Issues
5.1. Signs of Alignment Problems
Recognizing signs of alignment issues with your hidden door hinges is essential for maintaining their functionality and appearance. Keep an eye out for these common indicators:
Doors that don’t close properly, leaving gaps or requiring excessive force to shut.
Visual misalignment of the door or hinges, such as hinges that appear crooked or uneven.
Unusual sounds, such as squeaking or scraping, when opening or closing the door.
5.2. Adjusting Alignment
If you suspect or identify alignment problems, here’s how to address them:
Identify the source of the issue: Determine whether the problem lies with the hinge or the door itself. Sometimes, a misaligned door may not be a hinge problem.
Adjust hinge plates: Many hidden hinges feature adjustable plates or mounting options. Use these adjustments to fine-tune the door’s position for optimal alignment.
Seek professional help: In cases where alignment issues persist or are complex, it’s advisable to consult a professional. A skilled technician can conduct a thorough inspection and provide precise adjustments to ensure proper alignment.
5.3. Frequency of Alignment Checks
Regularly checking the alignment of your doors and hidden door hinges is essential. This is particularly crucial if you notice any signs of misalignment or if your doors are frequently used. By addressing alignment issues promptly, you prevent unnecessary wear and tear on the hinges.
Chapter 6: Preventing Corrosion

6.1. Corrosion Risks
Hidden door hinges are often exposed to moisture, making them susceptible to corrosion over time. Preventing corrosion is key to maintaining their functionality and appearance.
6.2. Preventive Measures
To protect your hidden hinges from corrosion, follow these preventive measures:
Choose corrosion-resistant hinges: When installing new hinges or replacing existing ones, opt for materials like stainless steel or brass. These materials are less prone to corrosion and will significantly extend the life of your hinges.
Paint or seal wooden doors: If your hidden hinges are installed on wooden doors, it’s crucial to ensure that the doors are adequately sealed or painted. This protective layer safeguards against moisture infiltration, reducing the risk of corrosion.
6.3. Frequency of Corrosion Prevention
Regularly inspect your hidden door hinges, especially if they are exposed to humid or coastal environments. Consider applying a protective coating or wax to maintain their resistance to corrosion. The frequency of these preventive measures may vary based on your local climate and environmental conditions.
Chapter 7: Inspecting for Damage
7.1. Regular Inspections
Routine inspections of your hidden door hinges are essential for identifying potential damage and addressing it promptly.
7.2. Signs of Damage
During your inspections, be on the lookout for these signs of hinge damage:
Cracks or chips in the hinge material.
Excessive wear on pivot points, leading to visible grooves or deformities.
Unusual noises, like grinding or popping, when opening or closing the door.
7.3. Replacing Damaged Hinges
If you discover any damage during your inspections, it’s critical to take action and replace the damaged hinge. Failing to address hinge damage promptly can lead to more extensive problems and compromise the overall integrity of the door.
7.4. Frequency of Inspections
Performing regular hinge inspections every few months is advisable. If your hidden door hinges are installed in high-traffic areas or endure heavy usage, consider increasing the frequency of inspections to catch potential damage early.
Chapter 8: Professional Maintenance
8.1. Periodic Professional Inspection
In addition to your regular maintenance efforts, consider scheduling periodic professional inspections of your hidden door hinges. These inspections can uncover potential problems before they escalate and provide expert adjustments and maintenance.
8.2. Routine Maintenance Services
Professional maintenance services may encompass lubrication, alignment adjustments, and tightening of screws, among other tasks. Investing in professional maintenance is a valuable step in ensuring the long-term functionality and appearance of your hidden door hinges.
Chapter 9: Conclusion
Maintaining your hidden door hinges is essential for ensuring they operate seamlessly and have a long and trouble-free lifespan. Regular cleaning, lubrication, inspections, and addressing alignment and corrosion issues will preserve the beauty and functionality of your doors. By following the detailed steps outlined in this guide and incorporating these maintenance practices into your routine, you can extend the life of your hidden door hinges and enjoy the convenience and aesthetic benefits they provide. Proper maintenance is the key to ensuring that your hidden door hinges continue to operate reliably and enhance the overall appeal of your doors and cabinets for years to come.


