Opening and closing doors is something we do countless times each day without much thought. But have you ever stopped to consider the unsung heroes that make this seamless motion possible? Spring hinges. These small yet mighty components are responsible for ensuring doors close smoothly and securely. However, like any hardworking part, they need a bit of care to keep performing at their best. That’s where maintenance comes in. In this comprehensive guide, we’ll take you through a step-by-step process on how to maintain spring hinges, so they continue to serve you faithfully for years to come. Whether it’s the front door, a cabinet, or any door in between, let’s delve into the world of spring hinges and the simple steps you can take to ensure they remain in top-notch condition.
Step 1: Gather Your Supplies
Before you begin, gather the following supplies:
- Soft cloth or sponge
- Mild soap or detergent
- Water
- Lubricant (such as silicone spray or light oil)
- Screwdriver
Step 2: Remove the Hinge Pins
To start, carefully remove the hinge pins. Gently tap them with a screwdriver and a hammer from the bottom side of the hinge. This will release the tension and allow you to remove the pins easily.
Step 3: Clean the Hinges
Gather Cleaning Supplies: Grab a soft cloth or sponge, mild soap or detergent, and a bucket of water.
Create a Cleaning Solution: Mix a small amount of mild soap or detergent with water in the bucket. This solution will be used to clean the hinges.
Dampen the Cloth: Dip the cloth or sponge into the soapy water and wring it out so it’s damp but not dripping.
Clean the Hinges: Gently wipe down the hinges with the damp cloth. Pay attention to the hinge plates, pivot points, and any areas with visible dirt or grime.
Focus on Detail: For stubborn dirt or buildup, you can use an old toothbrush or a soft-bristle brush to gently scrub the hinge’s crevices.
Wipe Away Residue: After cleaning, use a clean, damp cloth to wipe away any soap residue. This prevents any leftover soap from attracting dirt.
Dry the Hinges: Allow the hinges to air dry or use a dry cloth to gently pat them dry. Ensuring they are completely dry prevents rust from forming.
Inspect for Cleanliness: Take a close look at the hinges to ensure they are clean and free from any dirt or grime.
Step 4: Lubricate the Hinges
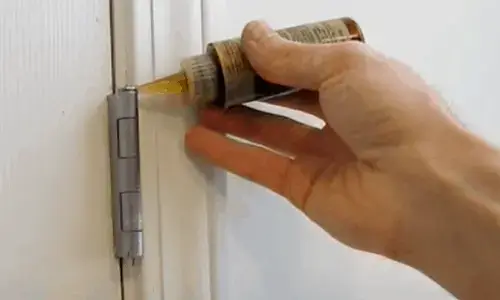
Choose the Right Lubricant: Use a silicone-based spray or light machine oil. Avoid using heavy greases as they can attract dust and debris.
Apply the Lubricant: Gently spray or apply a small amount of oil to the hinge’s pivot points and moving parts. Focus on the areas where friction occurs.
Wipe Excess: Use a clean cloth to wipe away any excess lubricant. You want enough lubrication to facilitate movement, but not so much that it attracts dirt.
Test the Movement: Open and close the door a few times to distribute the lubricant evenly. If you notice smoother movement, you’ve done it right!
Step 5: Reassemble the Hinges
Align the Hinges: Carefully line up the hinge plates on the door and the door frame. Make sure the holes for the hinge pins are perfectly aligned.
Insert the Hinge Pins: With the hinge plates properly aligned, gently insert the hinge pins into the hinge barrels. Start by tapping the pins lightly with a hammer.
Secure the Pins: Once the pins are in place, use a screwdriver and a hammer to gently tap the pins further. This secures them snugly into the hinge barrels.
Test the Movement: Open and close the door to ensure that the spring hinges are reassembled correctly. The door should move smoothly without any obstructions or misalignment.
Check for Balance: Stand back and observe if the door hangs evenly. If the door seems lopsided, you might need to adjust the hinge plates slightly.

Step 6: Check for Smooth Operation
Open and close the door several times to ensure that the spring hinges operate smoothly. Listen for any unusual sounds or resistance. If you notice any issues, double-check the hinge installation and lubrication.
Step 7: Make Necessary Adjustments
Identify the Issue: If the door doesn’t close properly or the hinges feel stiff, you may need to make adjustments. Take note of the specific problem you’re facing.
Locate the Adjustment Screw: Many spring hinges have an adjustment screw. This screw controls the tension of the spring. It’s usually located on the hinge itself.
Turn the Screw: Using a screwdriver, gently turn the adjustment screw. Turning it clockwise increases the tension, while turning it counterclockwise decreases it. Make small adjustments at a time.
Test the Door: After each adjustment, open and close the door. Observe if the door now closes smoothly and without resistance.
Fine-Tuning: If needed, continue making small adjustments until the door’s movement is optimal. Be patient and take your time to find the right balance.
Equal Adjustment: If you’re adjusting multiple hinges on the same door, ensure that you make equal adjustments to maintain balance.
Step 8: Wipe Excess Lubricant
After making adjustments and ensuring smooth operation, wipe away any excess lubricant using a clean cloth. This prevents dust and dirt from accumulating on the hinges.
Step 9: Regular Maintenance Routine
To keep your spring hinges in optimal condition, establish a regular maintenance routine. Depending on usage, perform these steps every six months to a year. Regular maintenance will not only extend the life of your hinges but also prevent potential issues down the road.
Tips and Precautions
1. Avoid using harsh chemicals or abrasive cleaners, as they can damage the hinge finish.
2. Don’t use too much lubricant, as it can attract dirt and debris.
3. If you’re unsure about making adjustments, consult the manufacturer’s guidelines or seek professional assistance.
4. Spring hinges with visible rust or extensive wear may need replacement instead of maintenance.
In Conclusion
Maintaining spring hinges doesn’t require advanced skills–just some basic tools and a bit of time. By following this step-by-step guide, you can keep your spring hinges functioning smoothly and ensure that your doors close properly. Regular maintenance not only saves you from potential headaches but also prolongs the life of your hinges, contributing to the overall functionality and aesthetics of your space.