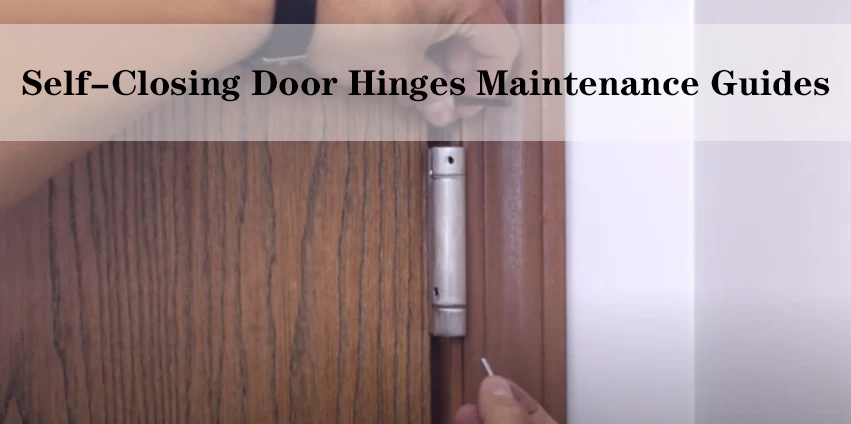
Welcome to our in-depth guide on how to install self-closing door hinges! This type of hinge is a fantastic upgrade for any home, offering benefits like improved safety, energy efficiency, and convenience. Whether you’re a seasoned DIY enthusiast or a novice, this step-by-step guide will help you through the process of installing these innovative hinges with ease.
Understanding Self-Closing Door Hinges
Before we embark on the journey of installation, it’s crucial to have a deeper understanding of what self-closing door hinges are and why they’re beneficial in various settings. So, what exactly are these hinges, and what makes them stand out?
Self-closing door hinges are ingeniously designed hardware that ensures a door closes automatically after being opened. This mechanism is usually achieved through a spring-loaded action within the hinge, which gently but firmly brings the door back to its closed position. The sophistication of these hinges lies in their seamless integration into everyday life, often going unnoticed while performing a vital function.
Common Types of Self-Closing Door Hinges
Self-closing door hinges are an essential component in many residential and commercial settings, ensuring doors close automatically for safety, privacy, and energy efficiency. Here are some of the most common types of self-closing door hinges:
Surface-Mounted Spring Hinges: These hinges are mounted on the surface of the door and frame, making them easier to install since they don’t require a mortise. The spring tension can be adjusted to control the closing speed of the door.
Butterfly Hinges: Named for their shape, butterfly hinges can offer a decorative element. Available in a variety of finishes and designs, these hinges can also come with a self-closing feature, combining functionality with aesthetics.
Concealed Hinges: Also known as European hinges, these are widely used in cabinetry. They’re not visible when the door is closed, offering a clean, sleek look. Many concealed hinges have a built-in self-closing mechanism, making them a popular choice for kitchen and bathroom cabinets.
Pivot Hinges: Pivot hinges differ from standard hinges in that they allow a door to rotate on a single point or axis, rather than along a hinge pin. They are typically mounted at the top and bottom of a door, allowing it to swing in a smooth, controlled arc. This mounting style gives a clean and often “hidden” look, as the hardware is less visible than traditional hinges.
Pin and Barrel Hinges with Spring Mechanism: These are among the most traditional types of self-closing hinges. They look like standard hinges but include an internal spring that pulls the door closed. They’re commonly used on entry doors, gates, and some interior doors.
Install Self-Closing Door Hinges: A Step-by-Step
Upgrading your doors with self-closing hinges is a fantastic way to add convenience and safety to your home. This guide will walk you through the process, step by step.
What You’ll Need
Gather the following tools and materials before starting the installation process:
- New self-closing door hinges
- Screwdriver or power drill
- Screws (usually included with the hinges)
- Tape measure
- Level
- Pencil
- Door wedge or support
1. Surface-Mounted Spring Hinges
These hinges are mounted on the surface of the door and frame, making them easier to install since they don’t require cutting into the door or frame.
Installation Guide:
Position the Hinge: Place the hinge on the door where you want it installed. Ensure it’s level and mark the screw holes.
Drill Pilot Holes: Drill small pilot holes where you’ve marked for screws.
Attach Hinge to Door: Screw the hinge onto the door using the pilot holes.
Repeat on Door Frame: Align the door with the frame, mark the screw positions on the frame, drill pilot holes, and then screw the hinge onto the frame.
Adjust Tension: Adjust the spring tension as needed for proper door closure.
2. Butterfly Hinges
Butterfly hinges are not only functional but also decorative, often used on vintage-style doors and cabinets.
Installation Guide:
Align and Mark: Position the hinge on the door/frame and mark the screw holes.
Pre-drill Holes: Drill holes at the marked spots for easier installation.
Secure Hinge: Fasten the hinge to the door and then to the frame using screws.
Adjust for Alignment: Check for proper door alignment and adjust as necessary.
3. Concealed (Euro-Style) Hinges
Ideal for a clean, modern look, these hinges are hidden when the door is closed and are commonly used in kitchen cabinets.
Installation Guide:
Bore Holes for Hinge Cups: Use a Forstner bit to bore holes in the door for the hinge cups.
Install Hinges in Door: Insert the hinges into the holes and secure them with screws.
Attach to Cabinet Frame: Mount the door to the cabinet frame, aligning the hinges with the frame.
Fine-Tune Adjustments: Adjust the hinges for height, depth, and side-to-side for a perfect fit.
4. Pivot Hinges
Pivot hinges allow the door to swing in both directions and are often used in commercial settings.
Installation Guide:
Mark the Pivot Points: Identify and mark where the top and bottom pivots will be placed on the door and the frame.
Install Top and Bottom Pivots: Secure the top pivot on the door frame and the bottom pivot on the floor or threshold.
Attach Door: Fit the door onto the pivots, ensuring it’s level and swings freely.
Adjust as Necessary: Make any necessary adjustments to ensure smooth operation.
5. Pin and Barrel Hinges with Spring

These resemble traditional hinges but have an integrated spring mechanism for self-closing.
Installation Guide:
Remove Existing Hinges (if replacing): Unscrew the old hinges from the door and frame.
Position New Hinges: Align the new hinges where the previous ones were, or mark new positions.
Screw in Place: Fasten the hinges to the door and then to the frame.
Adjust Tension: Modify the spring tension for proper door function.
General Tips for Installing Self-Closing Hinges:
Measure Accurately: Always double-check your measurements for hinge placement.
Use the Right Tools: Having the correct tools, like drills, screwdrivers, and bits, is essential.
Follow Manufacturer Instructions: Specific hinges may have unique installation requirements, so it’s important to follow any provided instructions.
Safety First: Wear appropriate safety gear, such as eye protection, when using power tools.
Maintenance Tips of Self-Closing Door Hinges
Maintaining self-closing door hinges is crucial to ensure their longevity and proper functionality. Regular maintenance can prevent common issues like squeaking, sticking, or failure to close properly. Here are some key steps for maintaining self-closing door hinges after installation:

1. Regular Cleaning
Dust and Debris: Regularly clean the hinges with a soft cloth to remove dust and debris, which can accumulate and affect the hinge’s movement.
Mild Cleaning Solution: For tougher grime, use a mild soap and water solution, but avoid harsh chemicals that could damage the finish or material of the hinge.
2. Lubrication
Type of Lubricant: Use a suitable lubricant, such as silicone spray or lithium grease, for lubricating the hinge. Avoid using oil-based products like WD-40, as they can attract more dirt.
Frequency: Lubricate the hinges every six months to a year, or whenever you start to notice any squeaking or stiffness in the door’s movement.
3. Tightening Screws
Check Screws: Periodically check the screws on the hinges to ensure they haven’t become loose, as this can affect the door’s alignment and closing mechanism.
Tighten if Necessary: Use a screwdriver to tighten any loose screws. Be careful not to overtighten, as this can strip the screws or damage the door and frame.
4. Adjusting Spring Tension
Check Closure: Over time, the door may not close as efficiently due to changes in the spring tension.
Adjust Tension: Use a hex key or a tension lever (depending on the hinge model) to adjust the spring tension. Increase tension if the door closes too slowly or decrease it if the door slams shut.
5. Inspecting for Wear and Tear
Regular Inspection: Every once in a while, inspect the hinges for signs of wear and tear, such as rust or corrosion, especially in humid environments or outdoor settings.
Replacement: If a hinge is significantly worn or damaged, it may be best to replace it to ensure the door functions safely and properly.
6. Alignment Checks
Door Alignment: Occasionally check the alignment of the door. Misalignment can lead to improper closing and increased wear on the hinges.
Realign if Necessary: Realignment may involve adjusting the hinges or sometimes correcting the frame or door itself.
7. Managing Environmental Factors
Humidity and Temperature: Be aware that wood doors can expand or contract with changes in humidity and temperature, which can affect how the door closes.
Adjustments: Seasonal adjustments to the hinges might be necessary to account for these changes.
Conclusion
Installing self-closing door hinges is a straightforward process that can significantly enhance the functionality of your home. By following these steps, you can ensure a successful installation. Regular maintenance will keep your door working perfectly for years to come.
We hope this guide has been helpful. If you have any questions or tips based on your own experience, feel free to share them in the comments. Your feedback enriches our DIY community. Stay tuned for more practical and easy-to-follow home improvement guides!


