When you aim to infuse an air of opulence and refinement into your furniture or cabinets, few elements rival the enduring allure of gold hinges. These remarkable pieces of hardware not only fulfill a utilitarian role but also raise the visual allure of any environment. In this all-encompassing guide, we embark on a journey to delve into the diverse array of gold hinges that grace the market, offering a comprehensive understanding of their styles, functionalities, and applications. Furthermore, we’ll generously provide you with meticulous, step-by-step instructions on the art of installing these splendid embellishments. Whether you consider yourself a devoted DIY enthusiast or simply a homeowner with an eye for the finer details of interior design, rest assured that within these pages, you’ll unearth a trove of invaluable insights. These insights will enable you to harness the full potential of your gold hinges, thereby elevating the aesthetics of your living spaces to new heights, all while ensuring functionality and durability that lasts a lifetime.
Chapter 1: Tools and Materials Needed

Before you begin installing your gold hinges, it’s essential to gather the necessary tools and materials. Here’s a list of items you’ll need:
Gold Hinges: Purchase the appropriate type and quantity of gold hinges for your project.
Screws: Ensure you have screws that are the right size and length for your hinges and the material you’re attaching them to.
Screwdriver: A screwdriver that matches the type of screws you’re using will be required.
Measuring Tape: Use this to accurately measure and mark the hinge placement.
Pencil: A pencil or a marking tool to make precise markings on your furniture or cabinet.
Chisel (if needed): Depending on the hinge type and your application, you may need a chisel to create recesses for the hinge plates.
Safety Gear: Always prioritize safety by wearing appropriate safety glasses and gloves, especially when working with power tools.
Drill (if needed): If you’re installing hinges on materials like wood or MDF, a drill with the appropriate drill bits will be necessary.
Chapter 2: Understanding Gold Hinges
Gold hinges, often made from brass or plated with gold, add a touch of sophistication and class to your furniture or cabinets. Their warm, lustrous appearance can elevate the overall aesthetics of any space, making them a popular choice for both traditional and contemporary designs. Before diving into the installation methods, let’s take a closer look at some common types of gold hinges.
2.1. Butt Hinges

Butt hinges are a timeless and versatile choice for various applications, such as doors, cabinets, and boxes. They are named for their flat, rectangular-shaped leaves, and are known for their strength and durability.
Detailed Installation Steps for Butt Hinges:
Mark the Hinge Locations: To begin the installation of butt hinges, first, position the door or cabinet in its intended location. Use a pencil or a scoring tool to mark the hinge locations on both the door and the frame. Ensure that the hinge leaves are aligned and evenly spaced.
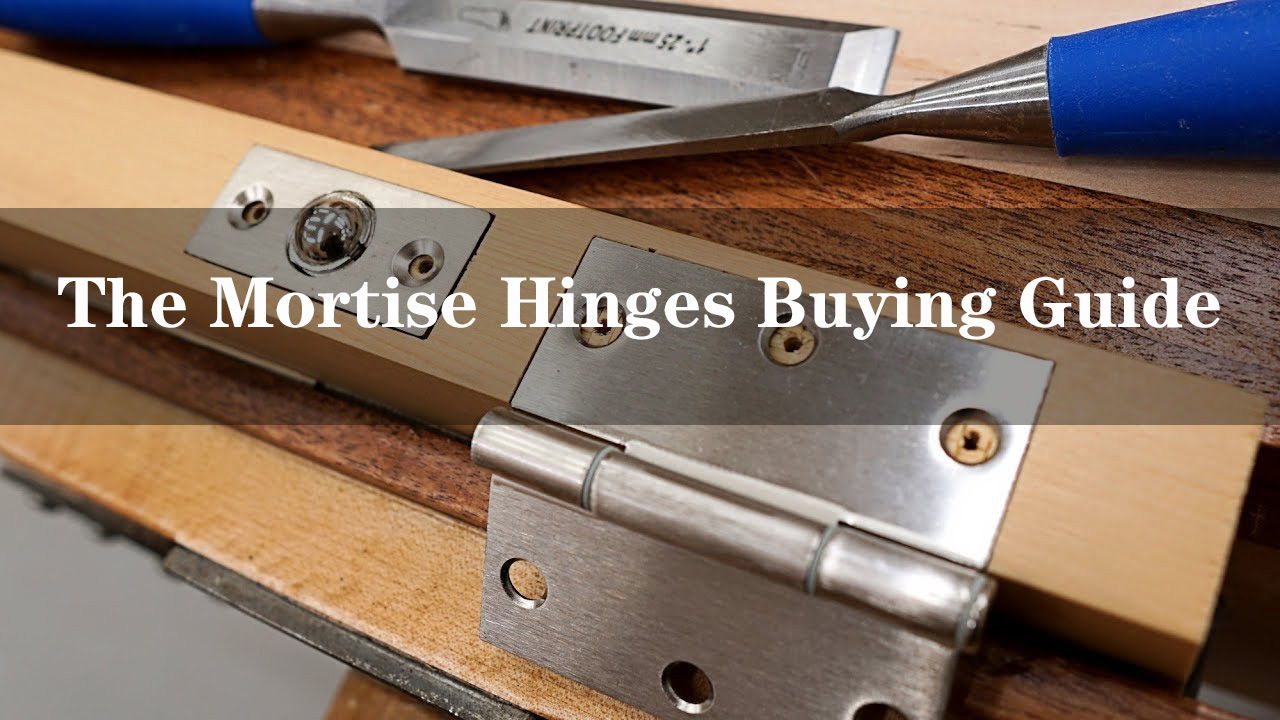
Chisel the Mortises: After marking the hinge locations, it’s time to create mortises, which are shallow recessed slots in the door and the frame to accommodate the hinge leaves. Use a chisel and a hammer to carefully chisel out these mortises. The depth of the mortise should match the thickness of the hinge leaves. Take your time to ensure a precise fit.
Attach the Hinge Leaves: Once the mortises are ready, secure one hinge leaf onto the door and the other onto the frame or stationary surface using screws. Make sure the hinge knuckles align perfectly when the door is closed, allowing for a smooth, flush appearance.
Test the Swing: After attaching the hinge leaves, open and close the door several times to ensure it swings smoothly without any obstructions. Check for proper alignment and adjust if necessary.
Butt hinges are a reliable choice for a wide range of applications, providing durability and stability while maintaining a classic appearance.
2.2. Pivot Hinges

Pivot hinges, also known as central hinges or pivot sets, are renowned for their ability to create a sleek and minimalist look for hidden doors, cabinets, and high-end furniture.
Detailed Installation Steps for Pivot Hinges:
Mark the Pivot Point: Determine the desired pivot point for your door or cabinet. It should typically be positioned slightly above the centerline of the door or cabinet, allowing for smooth rotation.
Drill Pivot Holes: Using a drill equipped with a spade bit or a hole saw, create a hole at the marked pivot point. The hole’s diameter should match that of the pivot hinge. Ensure that the hole is drilled straight and at the correct height for the desired pivot.
Install Pivot Hinge: Insert the pivot hinge into the hole you’ve created and secure it in place with the provided screws. Ensure the hinge is level and properly aligned. Pivot hinges often have an adjustment feature to fine-tune the rotation’s smoothness.
Attach Door or Cabinet: Once the pivot hinge is securely installed, mount the door or cabinet to it. Ensure that the door or cabinet swings freely and smoothly. Make any necessary adjustments to the hinge’s alignment for optimal performance.
Pivot hinges offer a contemporary and space-saving solution, making them ideal for concealed entrances or high-end furniture pieces.
2.3. European Hinges

European hinges, also known as concealed hinges, are a staple for modern cabinetry and furniture design. These hinges are designed to be hidden from view when the cabinet door is closed, providing a seamless and clean aesthetic.
Detailed Installation Steps for European Hinges:
Determine Mounting Plate Placement: Open the cabinet door and determine the ideal placement of the mounting plate. The mounting plate is typically attached to the cabinet frame and will serve as the anchor for the hinge.
Secure Mounting Plate: Attach the mounting plate to the cabinet frame using screws. Ensure that it’s level and properly aligned. European hinges often have adjustment slots in the mounting plate to allow for fine-tuning of the door’s position.
Attach Hinge Cup: The hinge cup is attached to the door itself. Depending on the specific type of European hinge, the cup can be inserted into a pre-drilled hole or attached with screws. Ensure that the hinge cup is properly aligned with the mounting plate.
Align Door and Cabinet: Carefully align the hinge cup with the mounting plate and secure it in place. European hinges often have adjustment screws for fine-tuning the alignment, ensuring that the cabinet door closes flush with the cabinet frame.
Test the Door: Open and close the cabinet door multiple times to ensure it swings smoothly and aligns perfectly with the cabinet frame. Make any necessary adjustments to achieve the desired fit and appearance.
European hinges provide a clean, modern look while allowing for easy adjustments to achieve a precise fit.
2.4. Continuous Hinges
Continuous hinges, also known as piano hinges, are characterized by their long, narrow design that runs the entire length of a door, panel, or lid. They are commonly used for applications where durability and full-length support are essential, such as piano lids, toolboxes, and folding tables.
Detailed Installation Steps for Continuous Hinges:
Measure and Cut Hinge: Begin by measuring the length of the door or panel where you intend to install the continuous hinge. Once you have the measurement, cut the hinge to the appropriate length using a hacksaw or a specialized metal-cutting saw. Ensure that the cut is clean and straight.
Mark Hinge Locations: Position the continuous hinge along the edge of the door or panel, ensuring that it’s flush. Mark the locations of the screw holes on both the hinge and the door or panel. Proper alignment is crucial to ensure the hinge’s stability and functionality.
Drill Pilot Holes: Using a drill with the appropriate-sized bit, drill pilot holes at the marked locations on the door or panel. These pilot holes will make it easier to insert screws without splitting the wood or damaging the hinge.
Attach Continuous Hinge: Secure the continuous hinge to the door or panel using screws. Make sure it’s aligned and flush with the edge. Be cautious not to overtighten the screws, as this can affect the hinge’s movement.
Test the Movement: Open and close the door or panel to ensure the hinge allows smooth movement without binding or catching. Continuous hinges are known for their durability and reliability, making them a preferred choice for heavy doors or lids.
Continuous hinges offer robust support and durability, making them an excellent choice for applications where full-length support is required.
Chapter 4: Maintenance and Care

To ensure the longevity and beauty of your gold hinges, it’s essential to maintain and care for them properly. Here are some tips:
4.1. Regular Cleaning:
Clean your gold hinges periodically with a soft, damp cloth to remove dust and grime.
Avoid abrasive cleaners or materials that could scratch the finish.
4.2. Lubrication:
Lubricate the hinge pins with a high-quality, non-corrosive lubricant to keep them moving smoothly.
This is particularly important for hinges that are exposed to humidity or moisture.
4.3. Tighten Screws:
Check the hinge screws periodically to ensure they are secure.
Loose screws can lead to misalignment and operational issues.
4.4. Avoid Overloading:
Do not overload cabinets or doors attached to gold hinges, as excessive weight can cause stress on the hinges and affect their function.
Conclusion
Incorporating gold hinges into your furniture or cabinetry can transform the overall look and feel of your living space. Whether you opt for the traditional elegance of butt hinges or the sleek minimalism of European hinges, understanding their types and proper installation techniques is crucial for a successful project.
By following the step-by-step installation guide outlined in this blog and practicing regular maintenance, you can ensure that your gold hinges not only enhance your decor but also serve their functional purpose reliably for years to come. With the right tools, materials, and care, your gold hinges will continue to add a touch of luxury and sophistication to your home.